Class Registration Support
Class Registration Resources
Placement Cards
Portal Navigation Guides
| Instructions | Images |
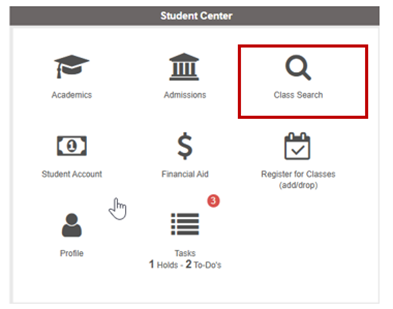
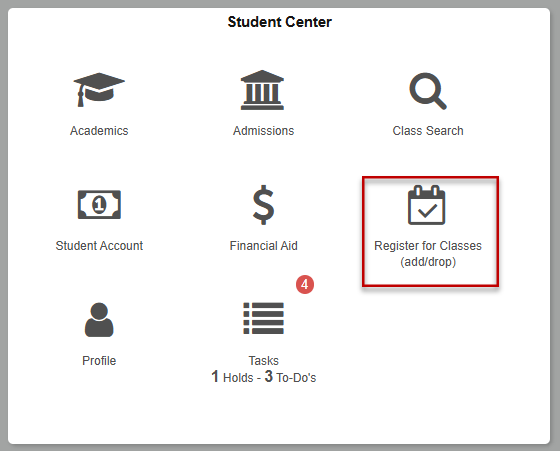
| Open the Student Center and click Class Search. |
|
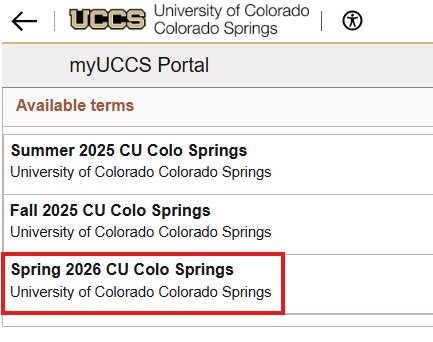
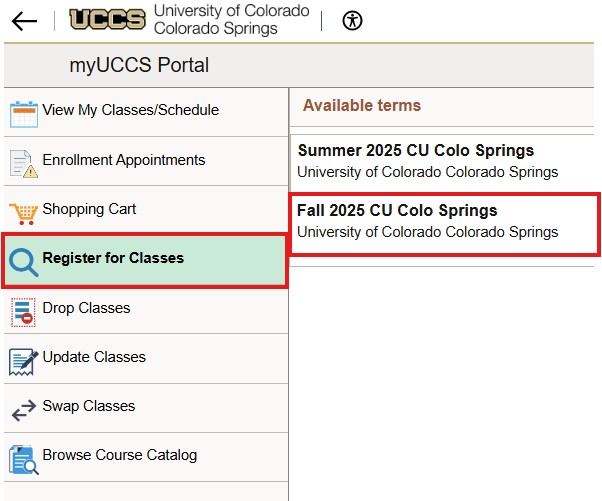
| Select the term you want. |
|
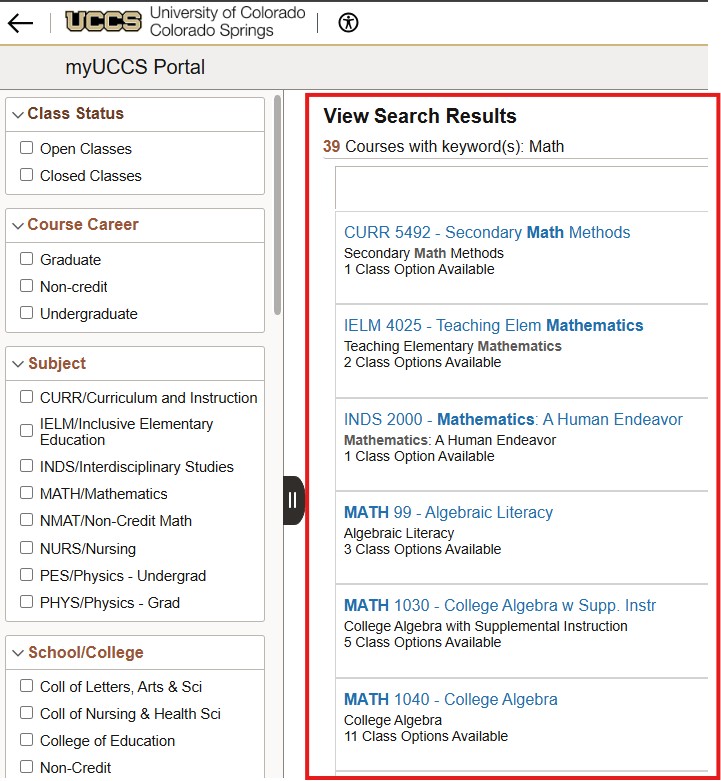
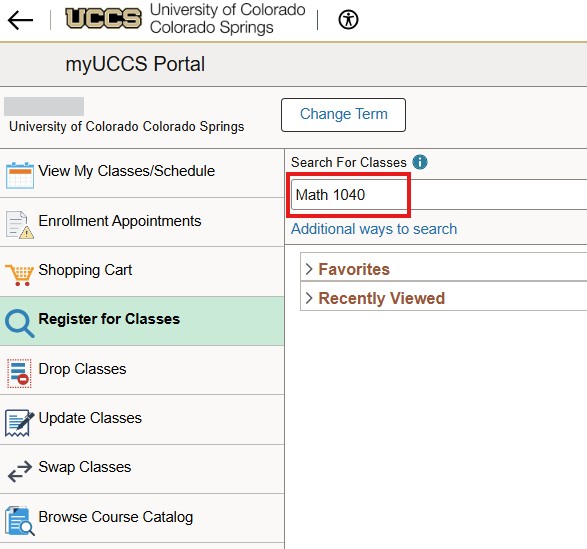
| Enter some key search words in the search box and click the arrow or type enter. |
|
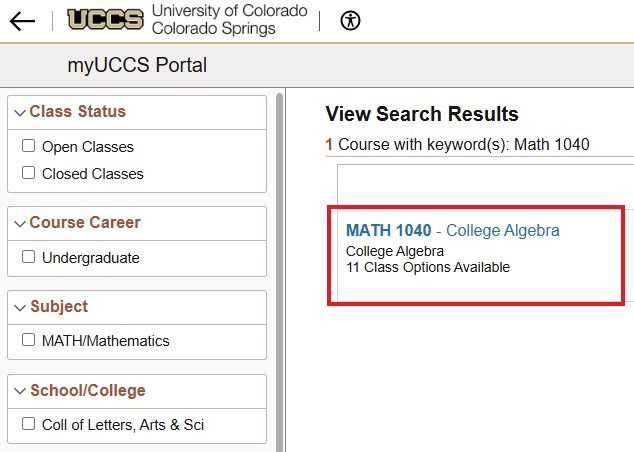
| Select results containing your keyword will appear. |
|
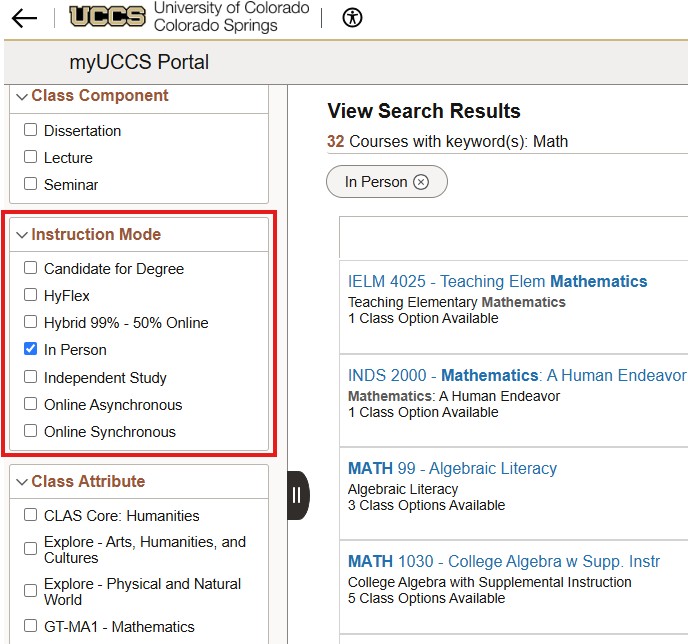
| Once you do a keyword search, note that you can use the facets in the left panel to narrow your search |
|
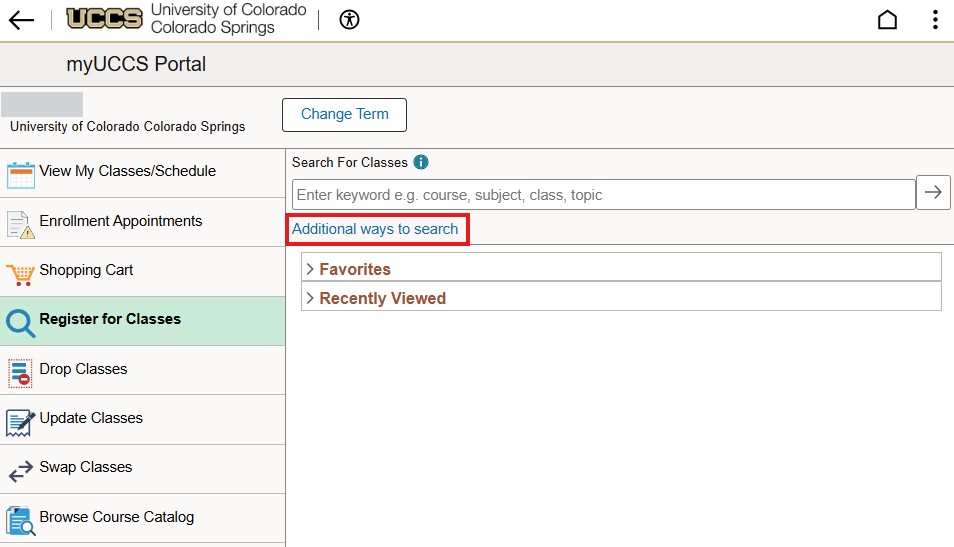
| Students can also use the Additional ways to search link to search by subject code and catalog number, or by Instructor. |
|
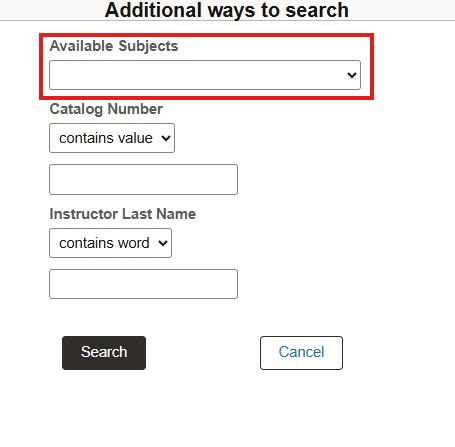
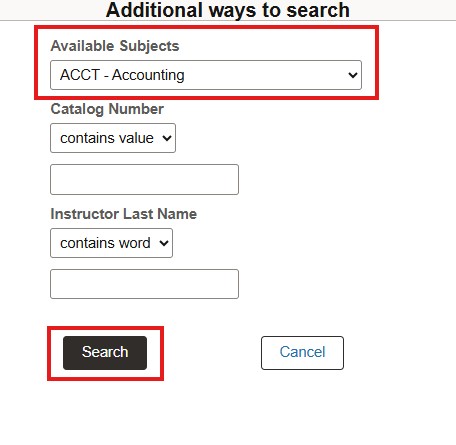
| You can search by course subject by selecting from the drop-down list. |
|
| You can select Search after selecting a subject and then choose from the results. |
|
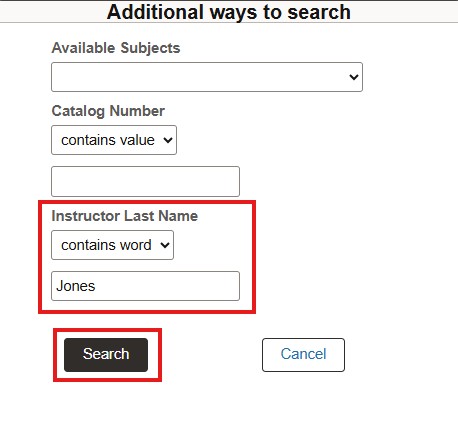
| You may also use facets to narrow your search, such as the instructor's last name. |
|
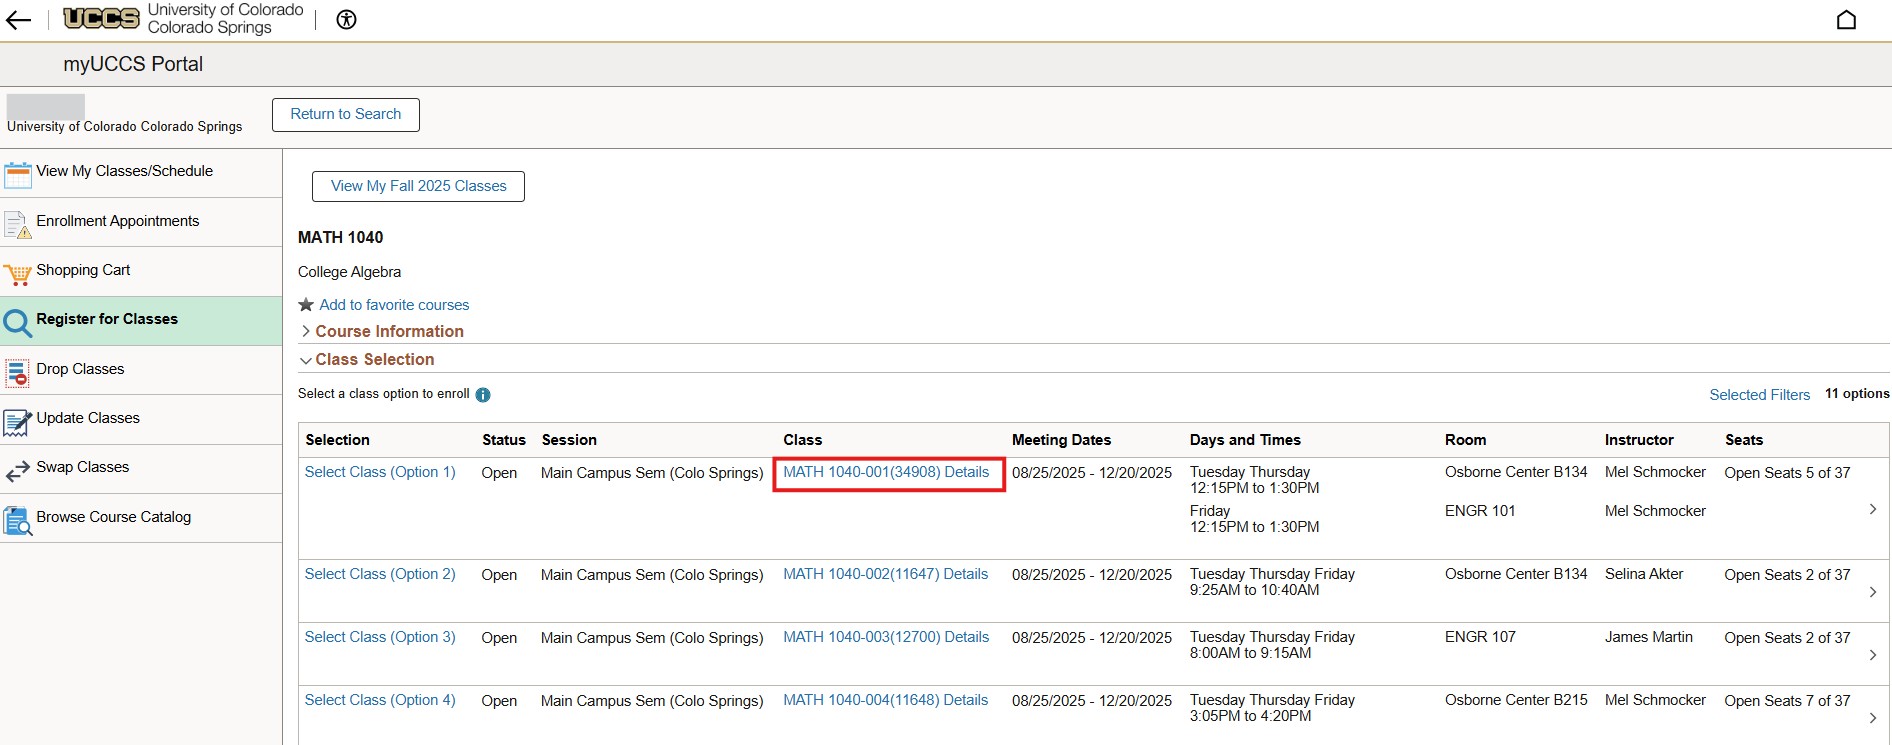
Select the results to view available class options. Select the drop-down arrow next to Course Information to view information about the course. To view more information about a class, select the blue hyperlink under the Class column. You can add this class search to your favorites by selecting the Add to Favorite Courses link. This will make it easier to find the right course when you move to Add a class. |
|
| Instructions | Images |
To prompt pre-registration, you follow the same initial steps for adding a class. Log-in to the student portal and click Register for Classes. |
|
| Select Register for Classes, then select the term to register. |
|
| If you know the course you wish to register for, you can type it in the search and then click on the arrow. Otherwise, you can use the Class Search to find a class. |
|
| Select the class. |
|
| If necessary, select the class section. |
|
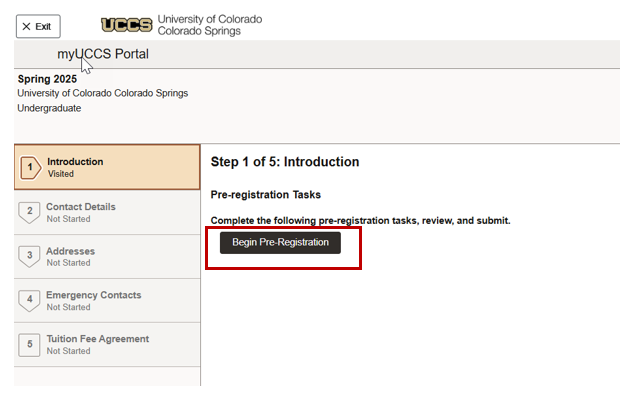
| Click the arrow. If you haven't finished pre-registration tasks, you'll need to complete it now. |
|
| Step 1: Click Begin Pre-Registration. |
|
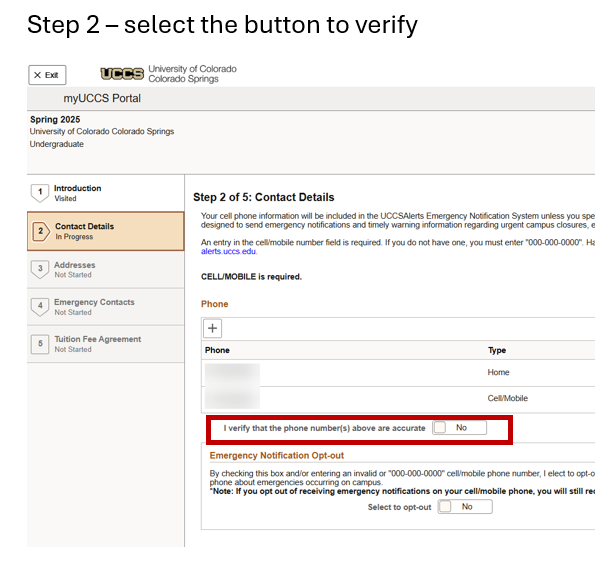
| Step 2: Verify that your phone number is accurate. |
|
| Step 3: Verify your address is correct. |
|
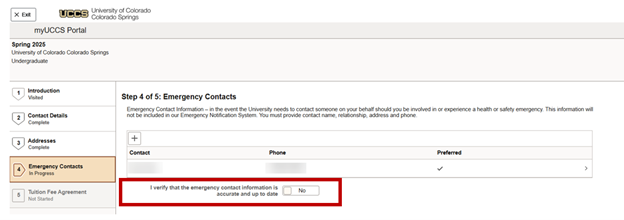
| Step 4: Verify your emergency contacts. |
|
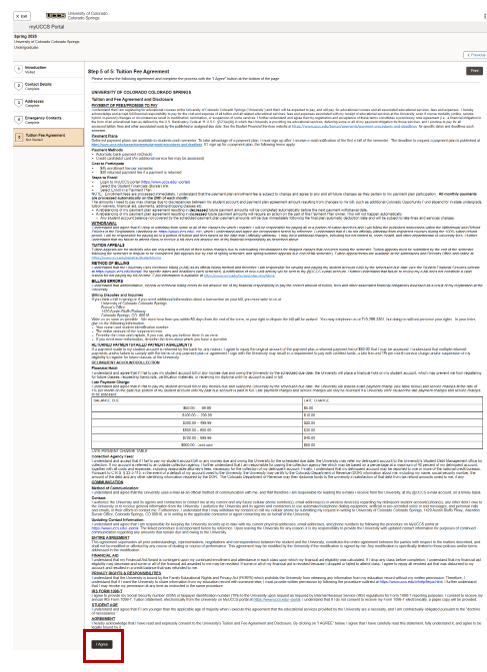
| Step 5: Read the tuition agreement and click I Agree at the bottom of the page. | |
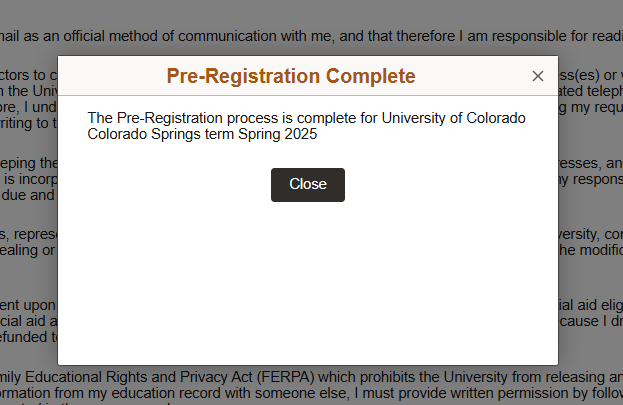
| After step 5, your pre-registration process is complete. Click Close and continue adding classes. |
| Instructions | Images |
| Click Register for Classes. |
|
| Select Register for Classes, then select the term to register. |
|
| If you know the course you wish to register for, you can type it in the search and then click on the arrow. Otherwise, you can use the Class Search to find a class. |
|
| Select the class. |
|
| Click the arrow. If you haven't finished pre-registration tasks, you'll need to complete it now. See the Pre-Registration page for detailed instructions. |
|
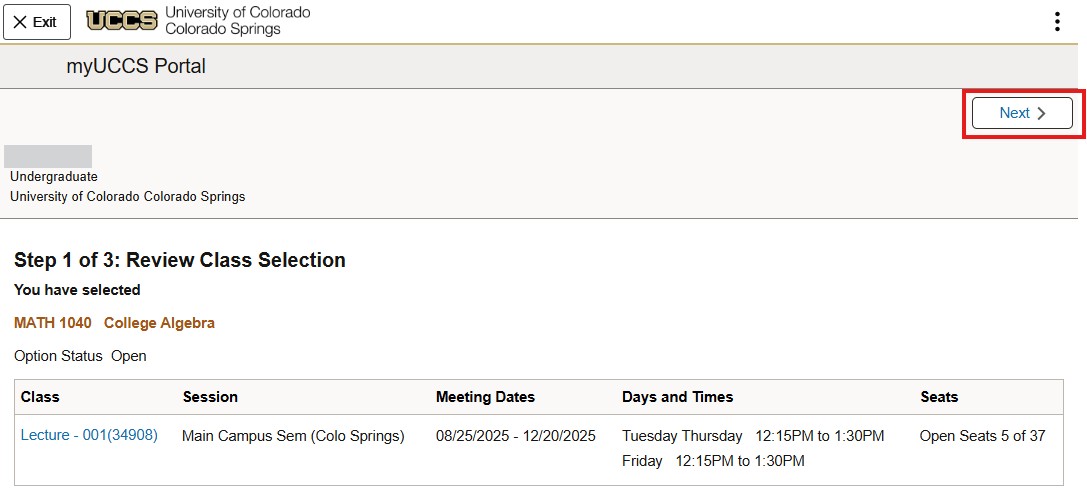
| Review the class selection, then click Next to proceed. |
|
| If your enrollment appointment is available, select Enroll. If you wish to add the course to your shopping cart, select the Add to Shopping Cart option. If you are taking a class that requires permission, you may add it here. Then click Accept. |
|
| Click Submit to enroll. |
|
| Click Yes to proceed and your class has been added. |
|
| Confirmation that class has been added |
| Instructions | Images |
| Click Register for Classes. |
|
| Select Drop Classes, then select the term to drop. |
|
| Select the class to drop, then click Next. | |
| Click Drop Classes to continue. |
|
| Click Yes to confirm. |
|
| The class has been dropped. |
|


